My home-baked bread loaves were going moldy very quickly (sometimes within 2-3 days) and I wanted to do something about it.
Obvious potential solutions
Passive ventilation
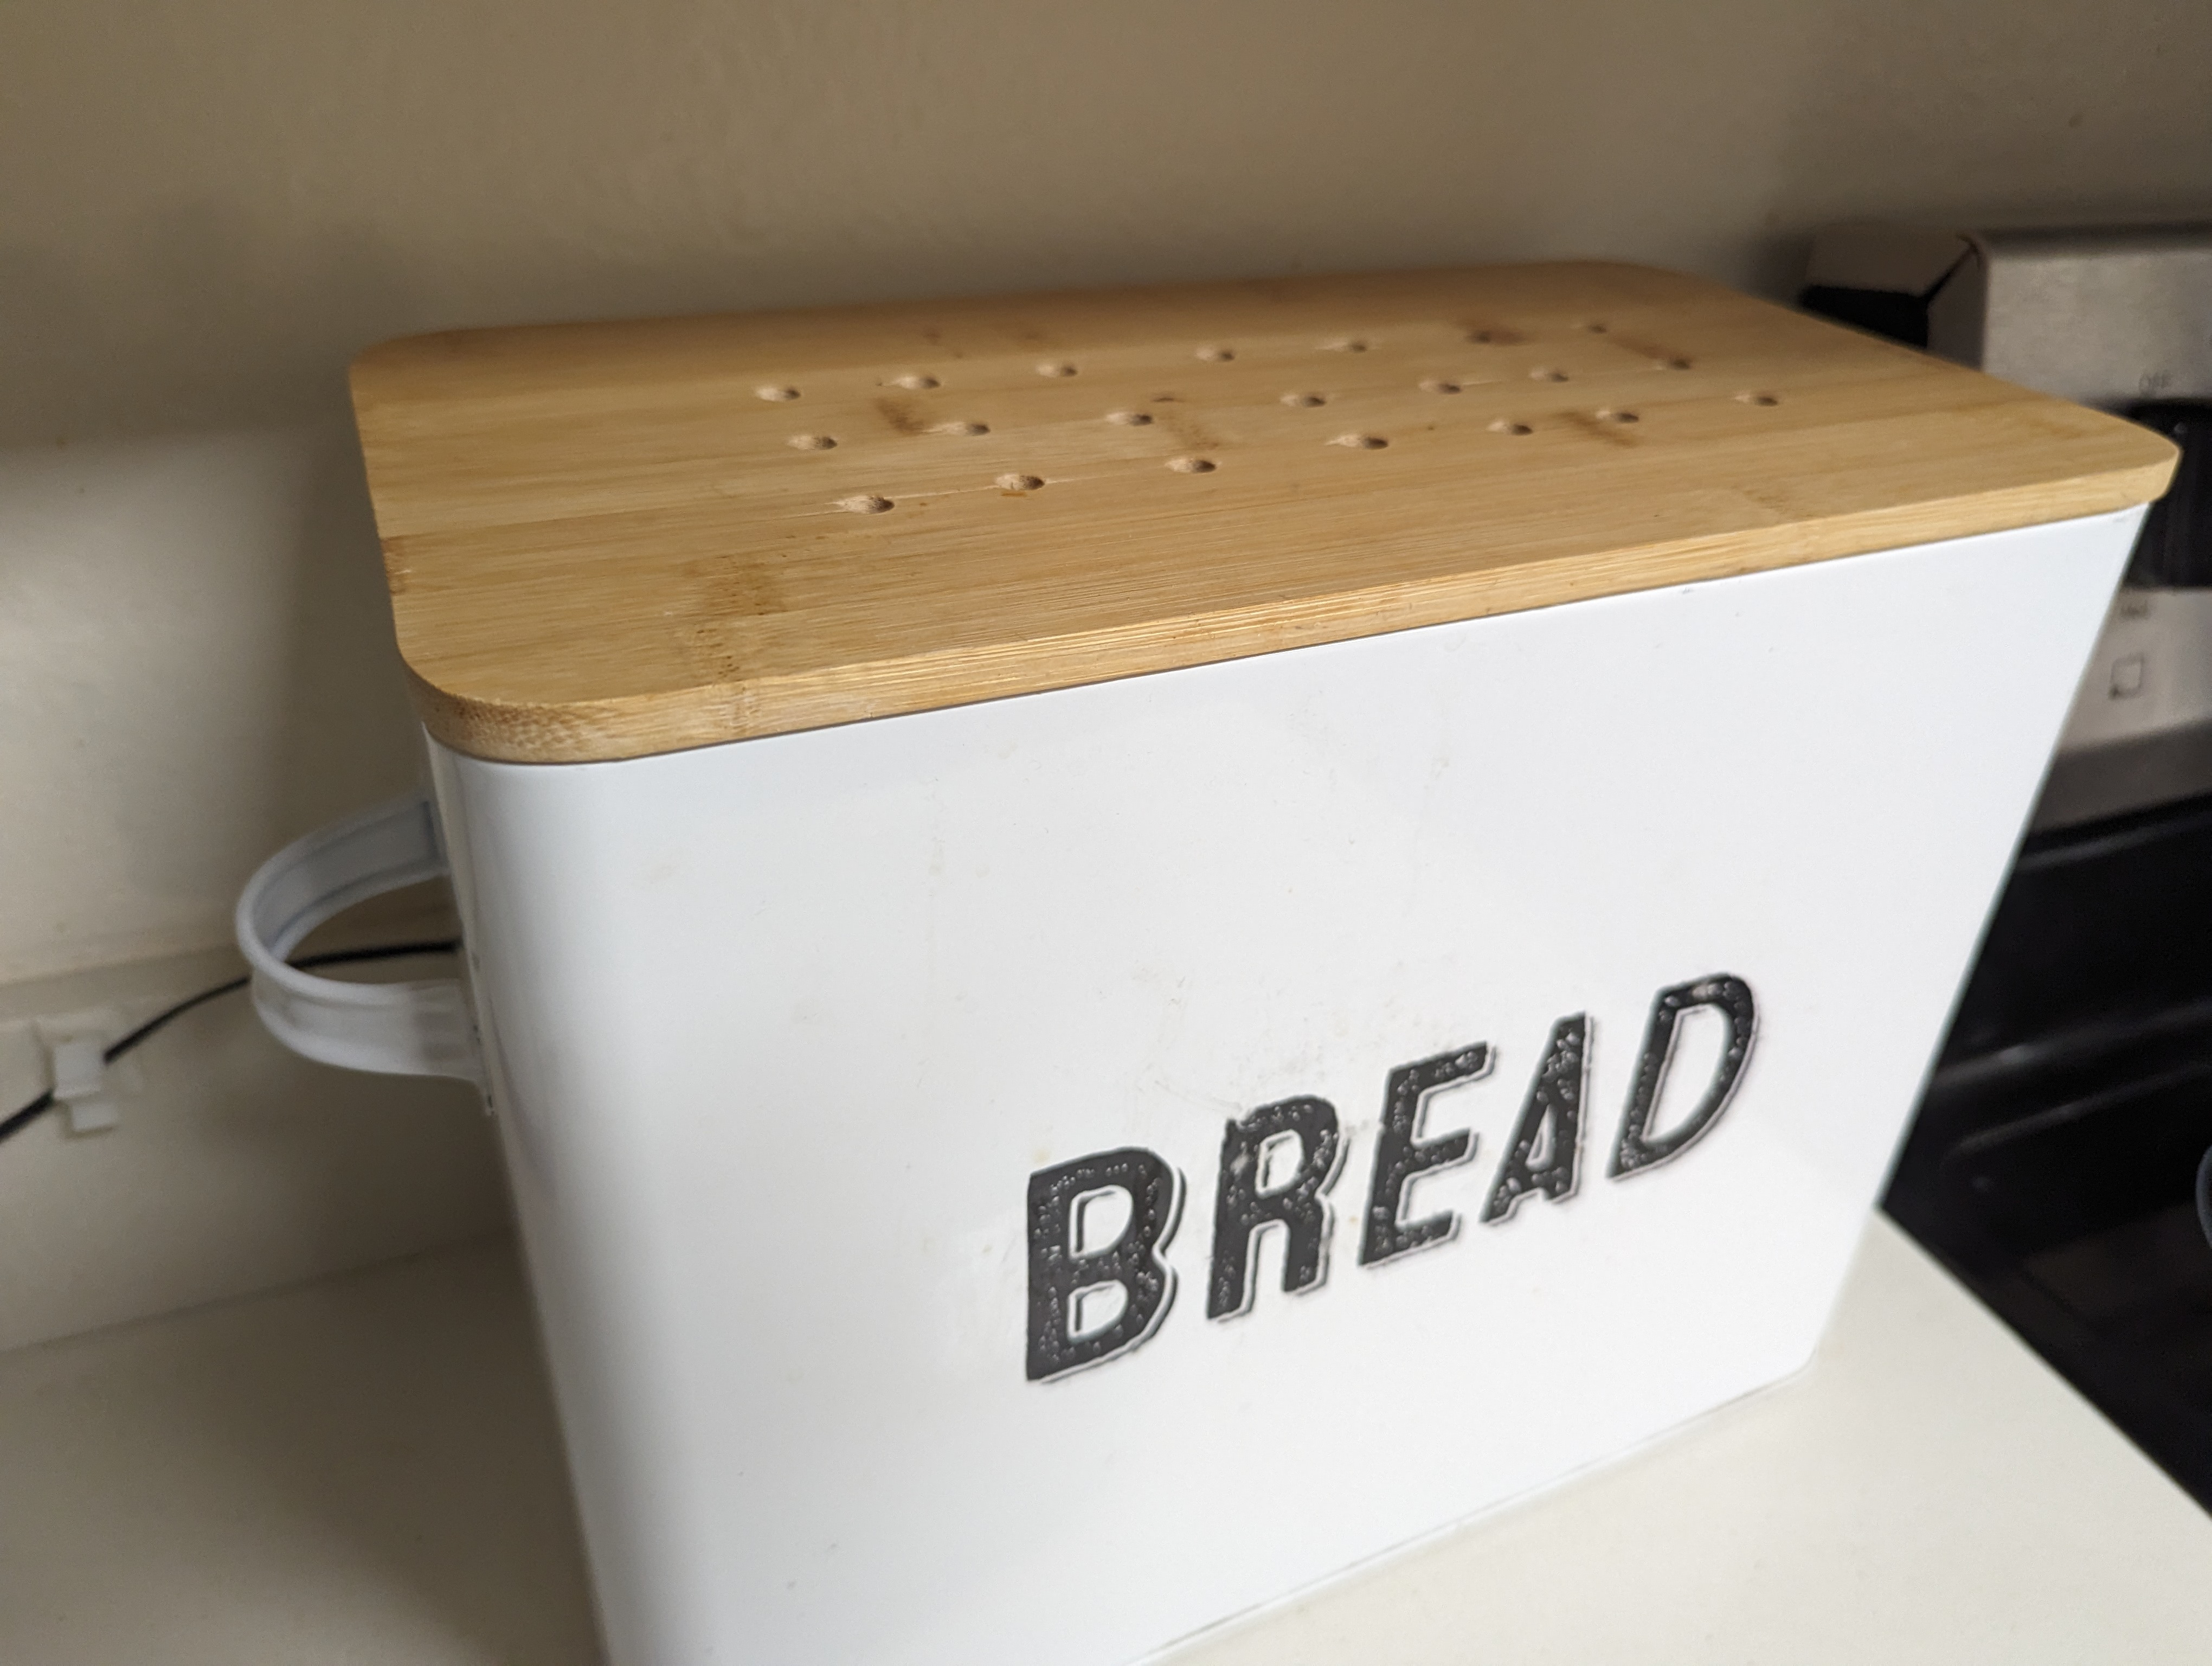
This bread bin didn’t have any ventilation at all, so I started by adding some holes in it. This helped, but I was still finding relative humidity was often over 85%, which I suspected was too high.
In the spirit of over-engineering a solution, I found a research paper1 about bread spoilage:
The excessively humid atmosphere (89.9% rh) dramatically provoked the growth of molds. […] Further, the occurrence of high humidity due to inappropriate wrapping materials or container design was found to promote microbial spoilage. Consequently, both factors should be considered when designing suitable storage methods for bread.1
Reduce storage time
Another obvious mitigation is to eat the bread faster, or freeze slices (which works well for toasting).
Active ventilation
I decided to set up an active ventilation system. Running a fan all the time would make humidity far too low, causing the bread to go stale and dry very quickly, so I built a controllable fan system.
Drill & bits for cutting whatever your bread bin is made of (and optionally a hole saw for the fan).
Assembly Steps
Drill some passive ventilation holes into the bread bin.
Create bolt holes and a circular hole for the fan. Find the right nuts & bolts to fasten the fan to the bread bin.
If you are in the US, Ace Hardware (at least my local one) have a good selection of bolts. You can try them in-store to avoid having to measure at home and order online.
I didn’t have a hole saw so I just made a messy hole with a circle of drill holes and knocked it out.
I mounted my fan on the back of the bread bin and drilled holes in the top.
NB: I recommend putting some washers between the fan and the bin - otherwise the fan blades might catch, especially if you don’t have a perfectly smooth and even edge on the hole.
Attach the fan - I mounted it as an extractor to create negative pressure, drawing air through the ventilation holes in the lid.
Connect the fan to the DC supply. I just used the screw terminal connector which is a bit ugly but works.
Connect the DC supply to the WiFi plug and test that it works and can turn the fan on.
Put the BLE sensor inside the bread bin. My bread bin is made of enameled steel, so it’s magnetic; the BLE sensor has small magnets on the back.
The BLE sensor publishes the humidity and temperature information encoded in a GATT characteristic at a regular interval of a few seconds. There are a number of characteristics, but this one clearly varies significantly when moving the sensor from e.g. indoors to outdoors. This guide describes using gatttool to enumerate the sensor’s characteristics, and shows its published characteristic notifications in interactive mode by default. I was able to figure out the encoding for the temperature and humidity values within this characteristic data blob (see the example code).
Controlling the fan
I implemented a very basic ‘control loop’:
Turn the fan on if humidity is above the target value.
Turn it off if humidity is below the target value.
If no readings have been received from the BLE sensor for 60s, turn the fan off; in practice, the BLE connection seems to be very reliable.
I spent a couple of weeks tweaking the target humidity till I was happy with the trade-off of premature staling vs. mold. This will depend on your bread’s moisture content, how quickly you eat it, and your environment. I have settled on a 75% humidity target.
NB: If the program itself crashes, then the fan will just be stuck on whatever state it was at that point. The Kasa smart plugs can be scheduled, so a failsafe of sorts might be to turn the fan off every few hours on a schedule.
Monitoring
The program pushes metrics to a Prometheus pushgateway server and is visualized with Grafana.
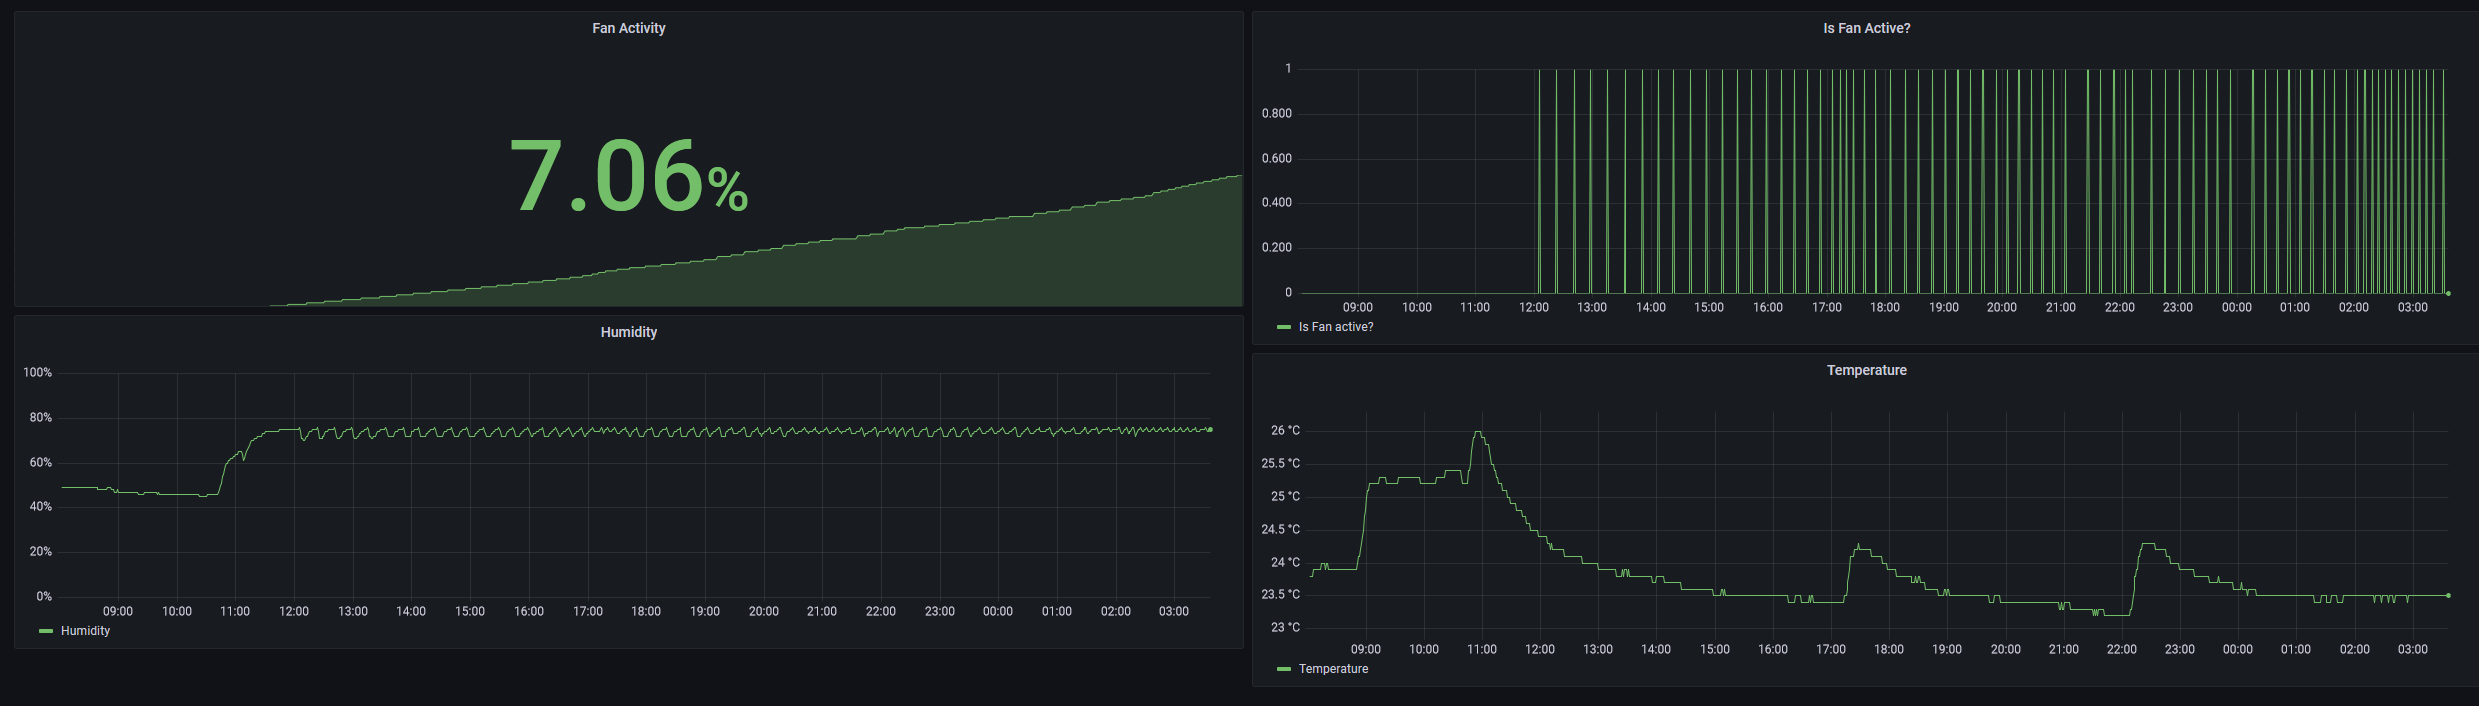
Grafana charts of the bread bin data
It’s noticeable that the humidity oscillates a couple of percent around the target value - a more sophisticated control loop like PID could help with stability, I haven’t experimented with this as the system works pretty well in practice.
Other tips
Wait until the bread has fully cooled down after baking before putting it in the bread bin.
Don’t cut the bread from both ends; put the cut side down to stop it drying out too quickly.
Clean out old crumbs between loaves to keep mold growth down.
Further, sanitary conditions are essential for the storage of bread and represent a simply accessible way to prolong the stability of bread. 1
This is an alternative, apparently rather effective approach, complete with a fun footnote about safety… UV Mold Free Bread Box.
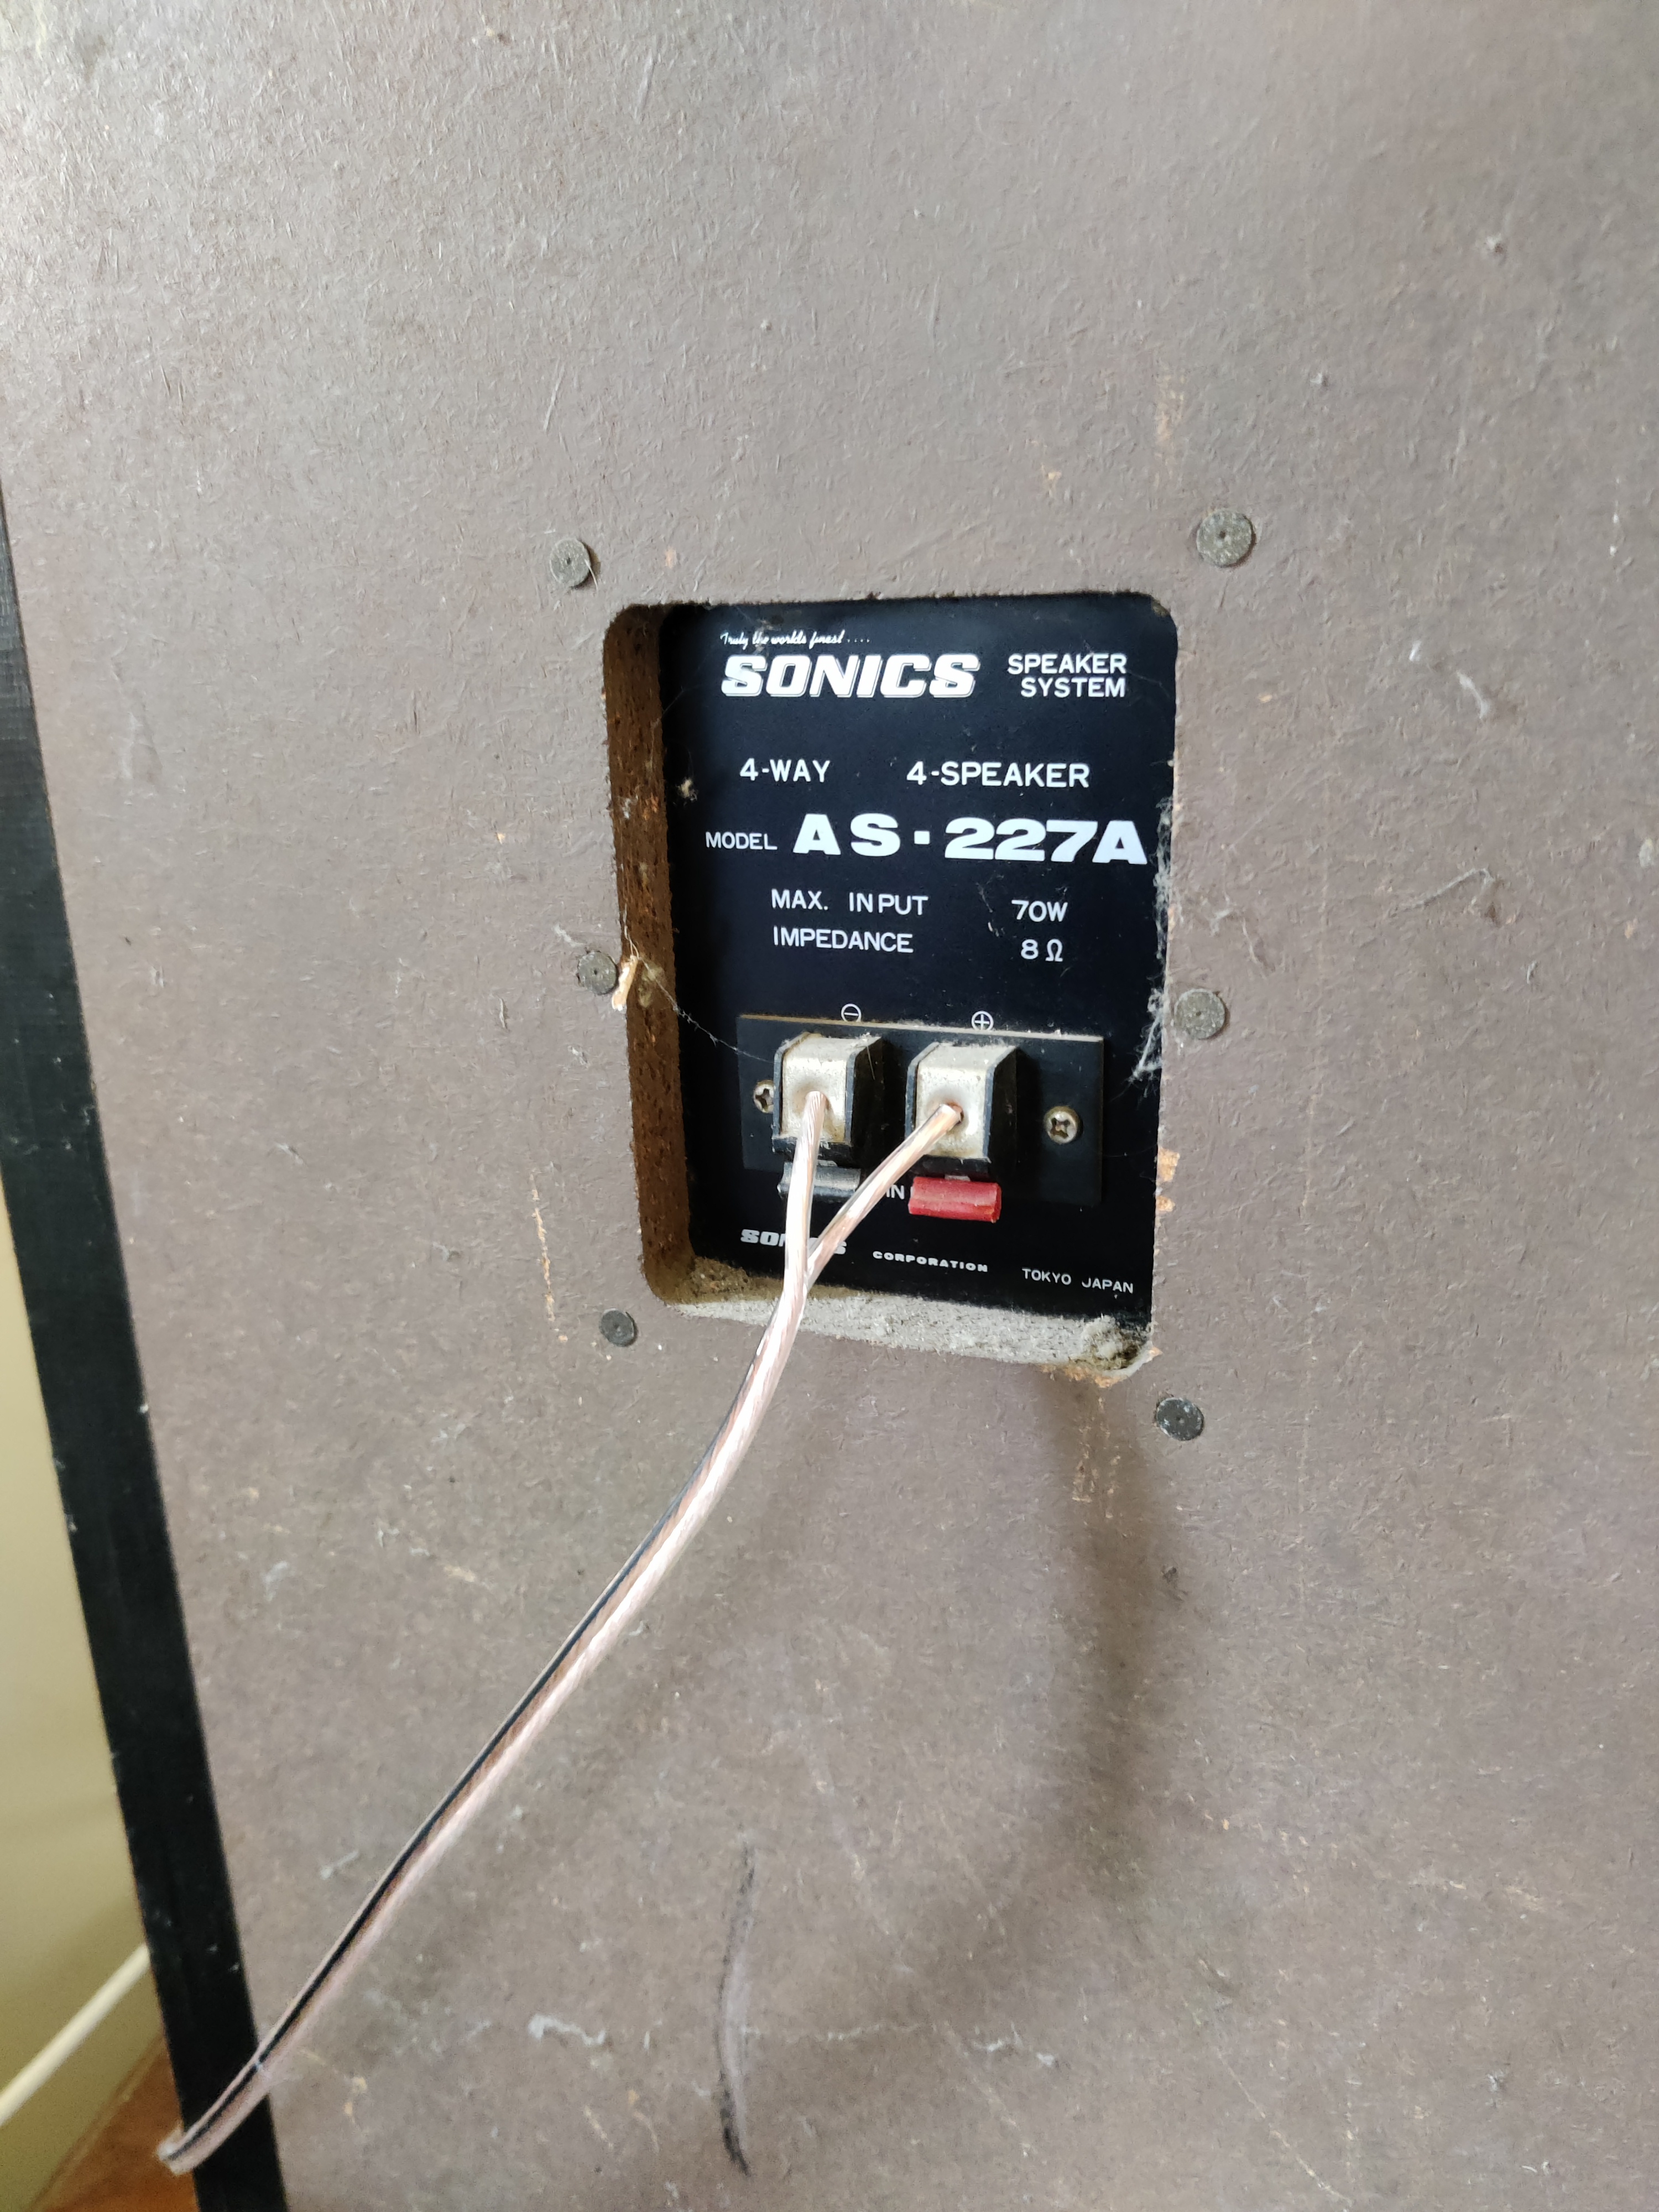
These Sonics AS-227A speakers had an intermittent fault where the sound would crackle and/or become muffled. They are of an indeterminate 1970s vintage, and were second-hand even when purchased back then. They are visually impressive and have a removable grille, which exposes controls for loudness, and an inductor-capacitor (LC network) based equaliser. The manual is available online.
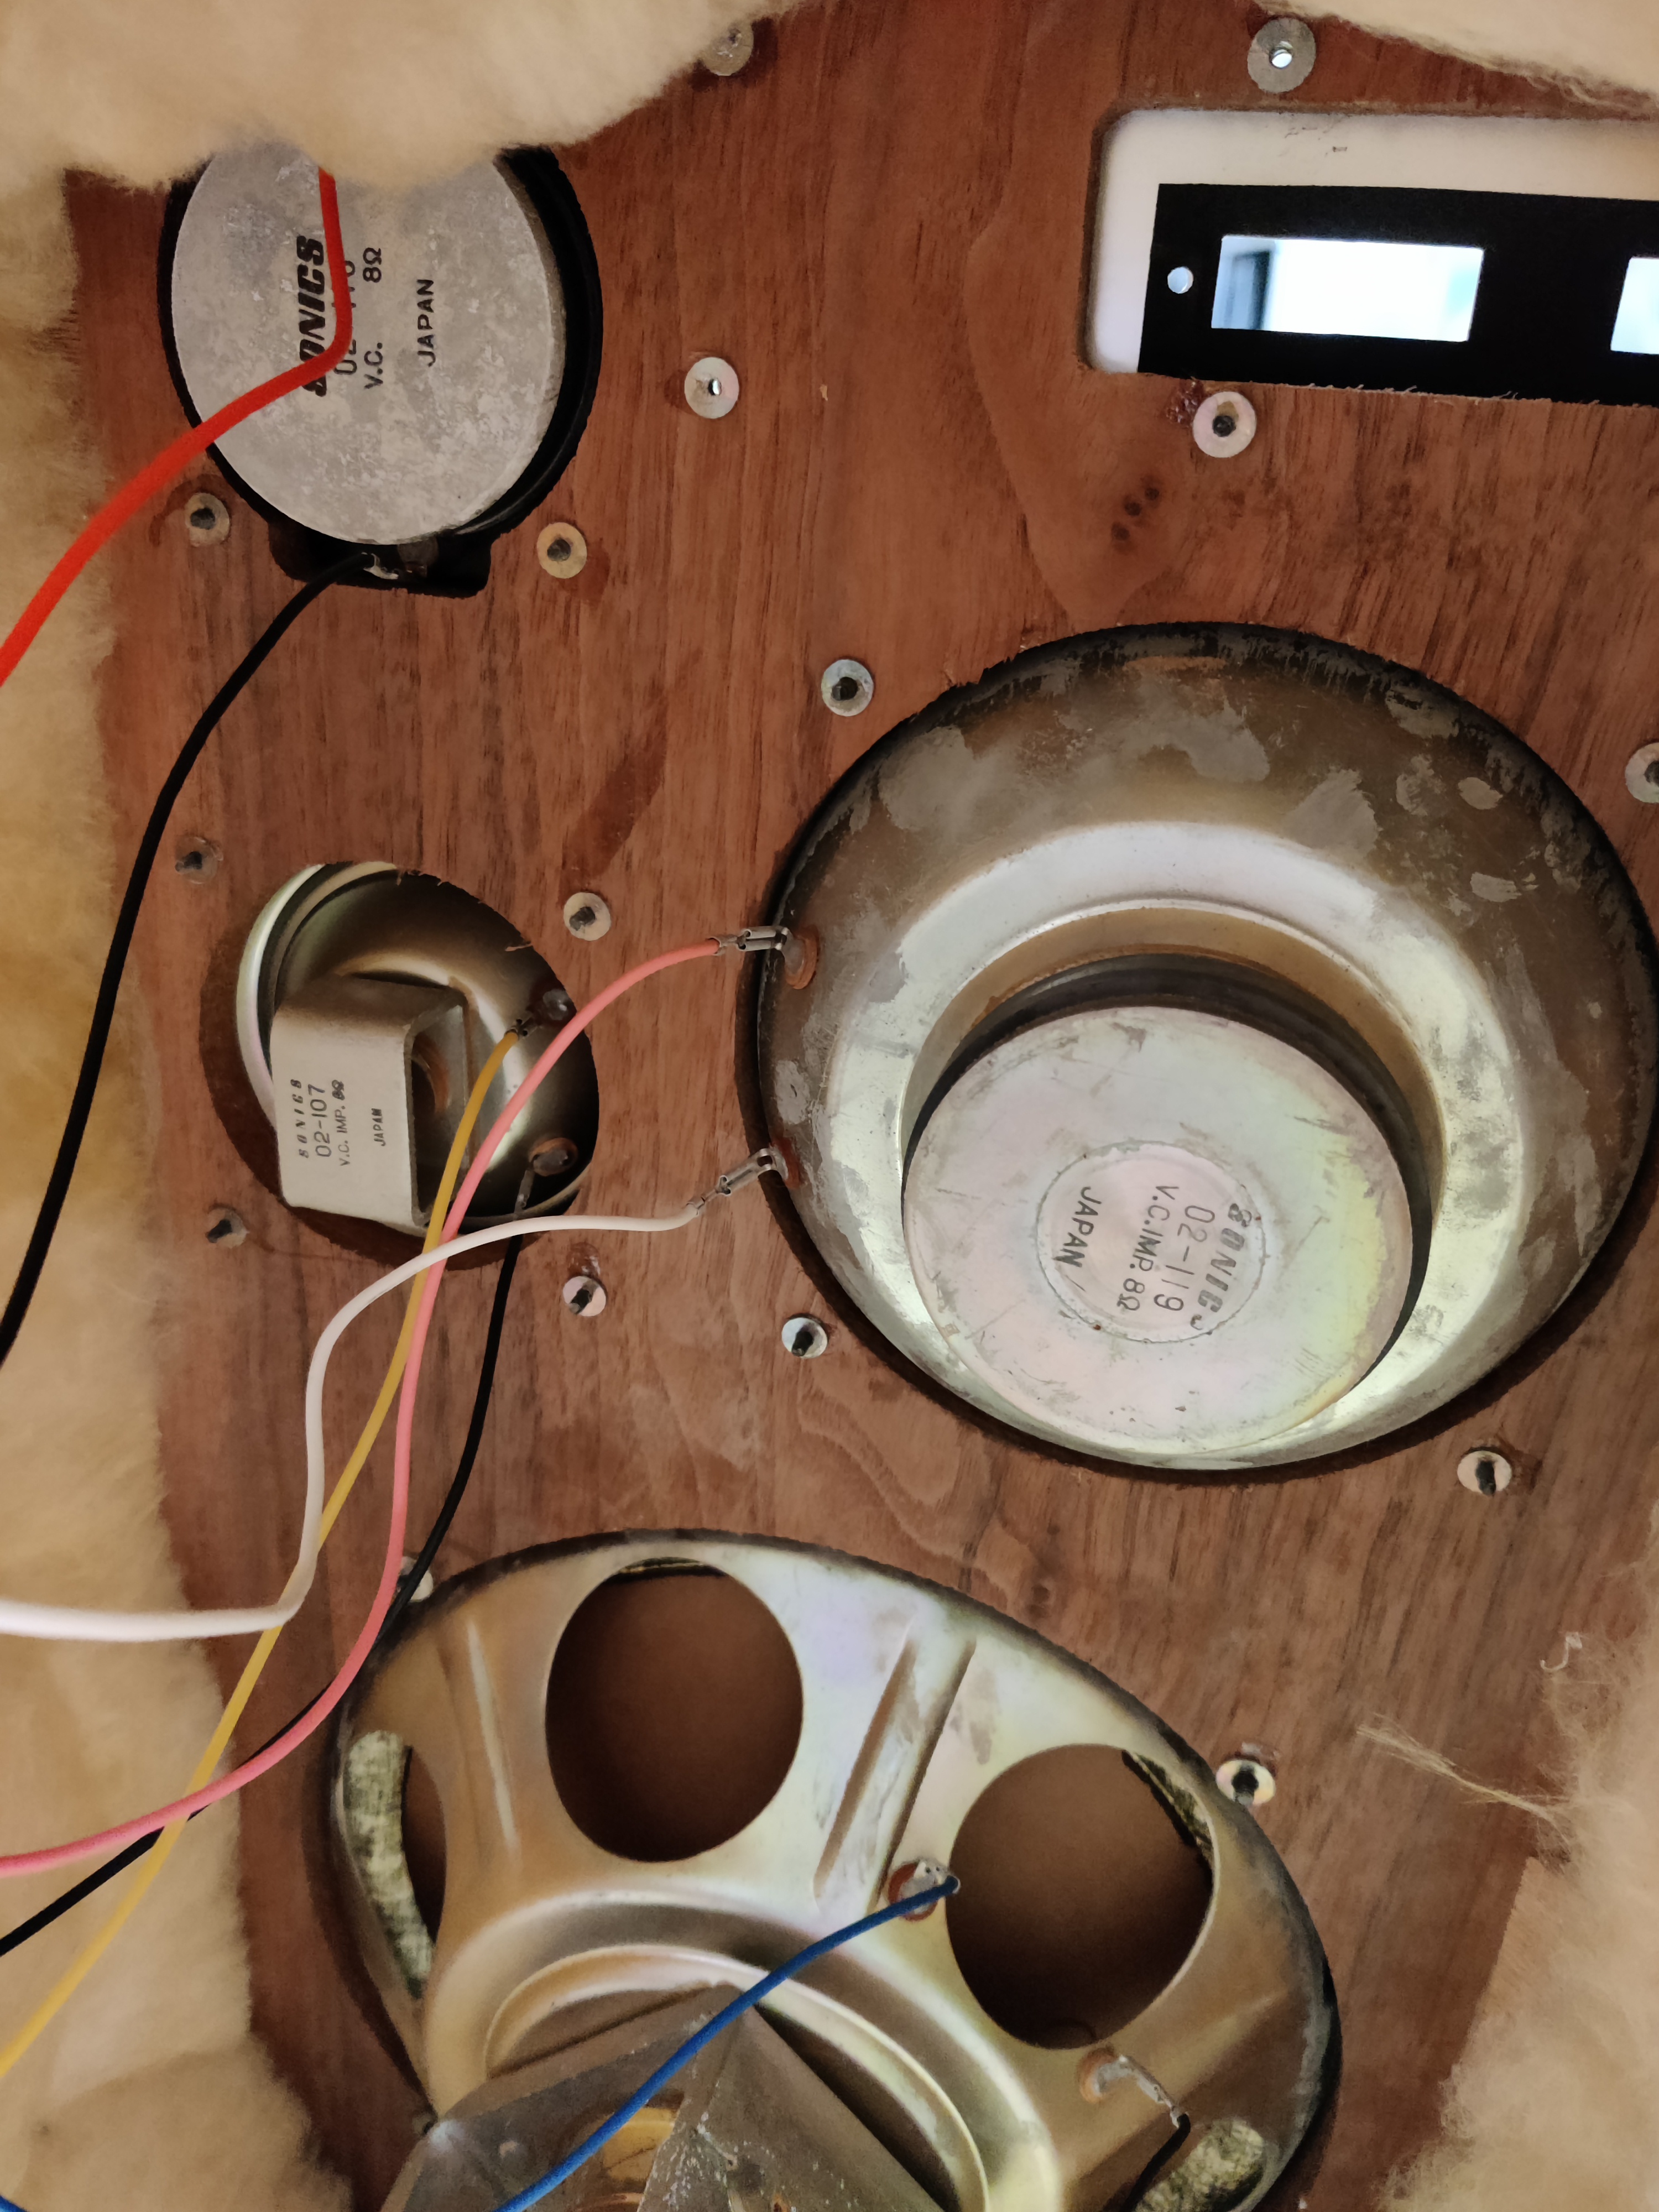
The back boards are attached with several wood screws which were covered with duct tape strips. There are four speaker drivers inside, with the equaliser controlling the relative volume levels. The cabinet is insulated with what looks like fibreglass to me (basic research shows that it shouldn’t contain asbestos). In any case I did not remove it - caution should be taken with this kind of material.
I followed various ‘debugging’ approaches:
Checking wiring and solder joints.
Desoldering the capacitors and testing them with an ESR meter.
Listening to the speaker drivers individually with test tones from a tone generator app.
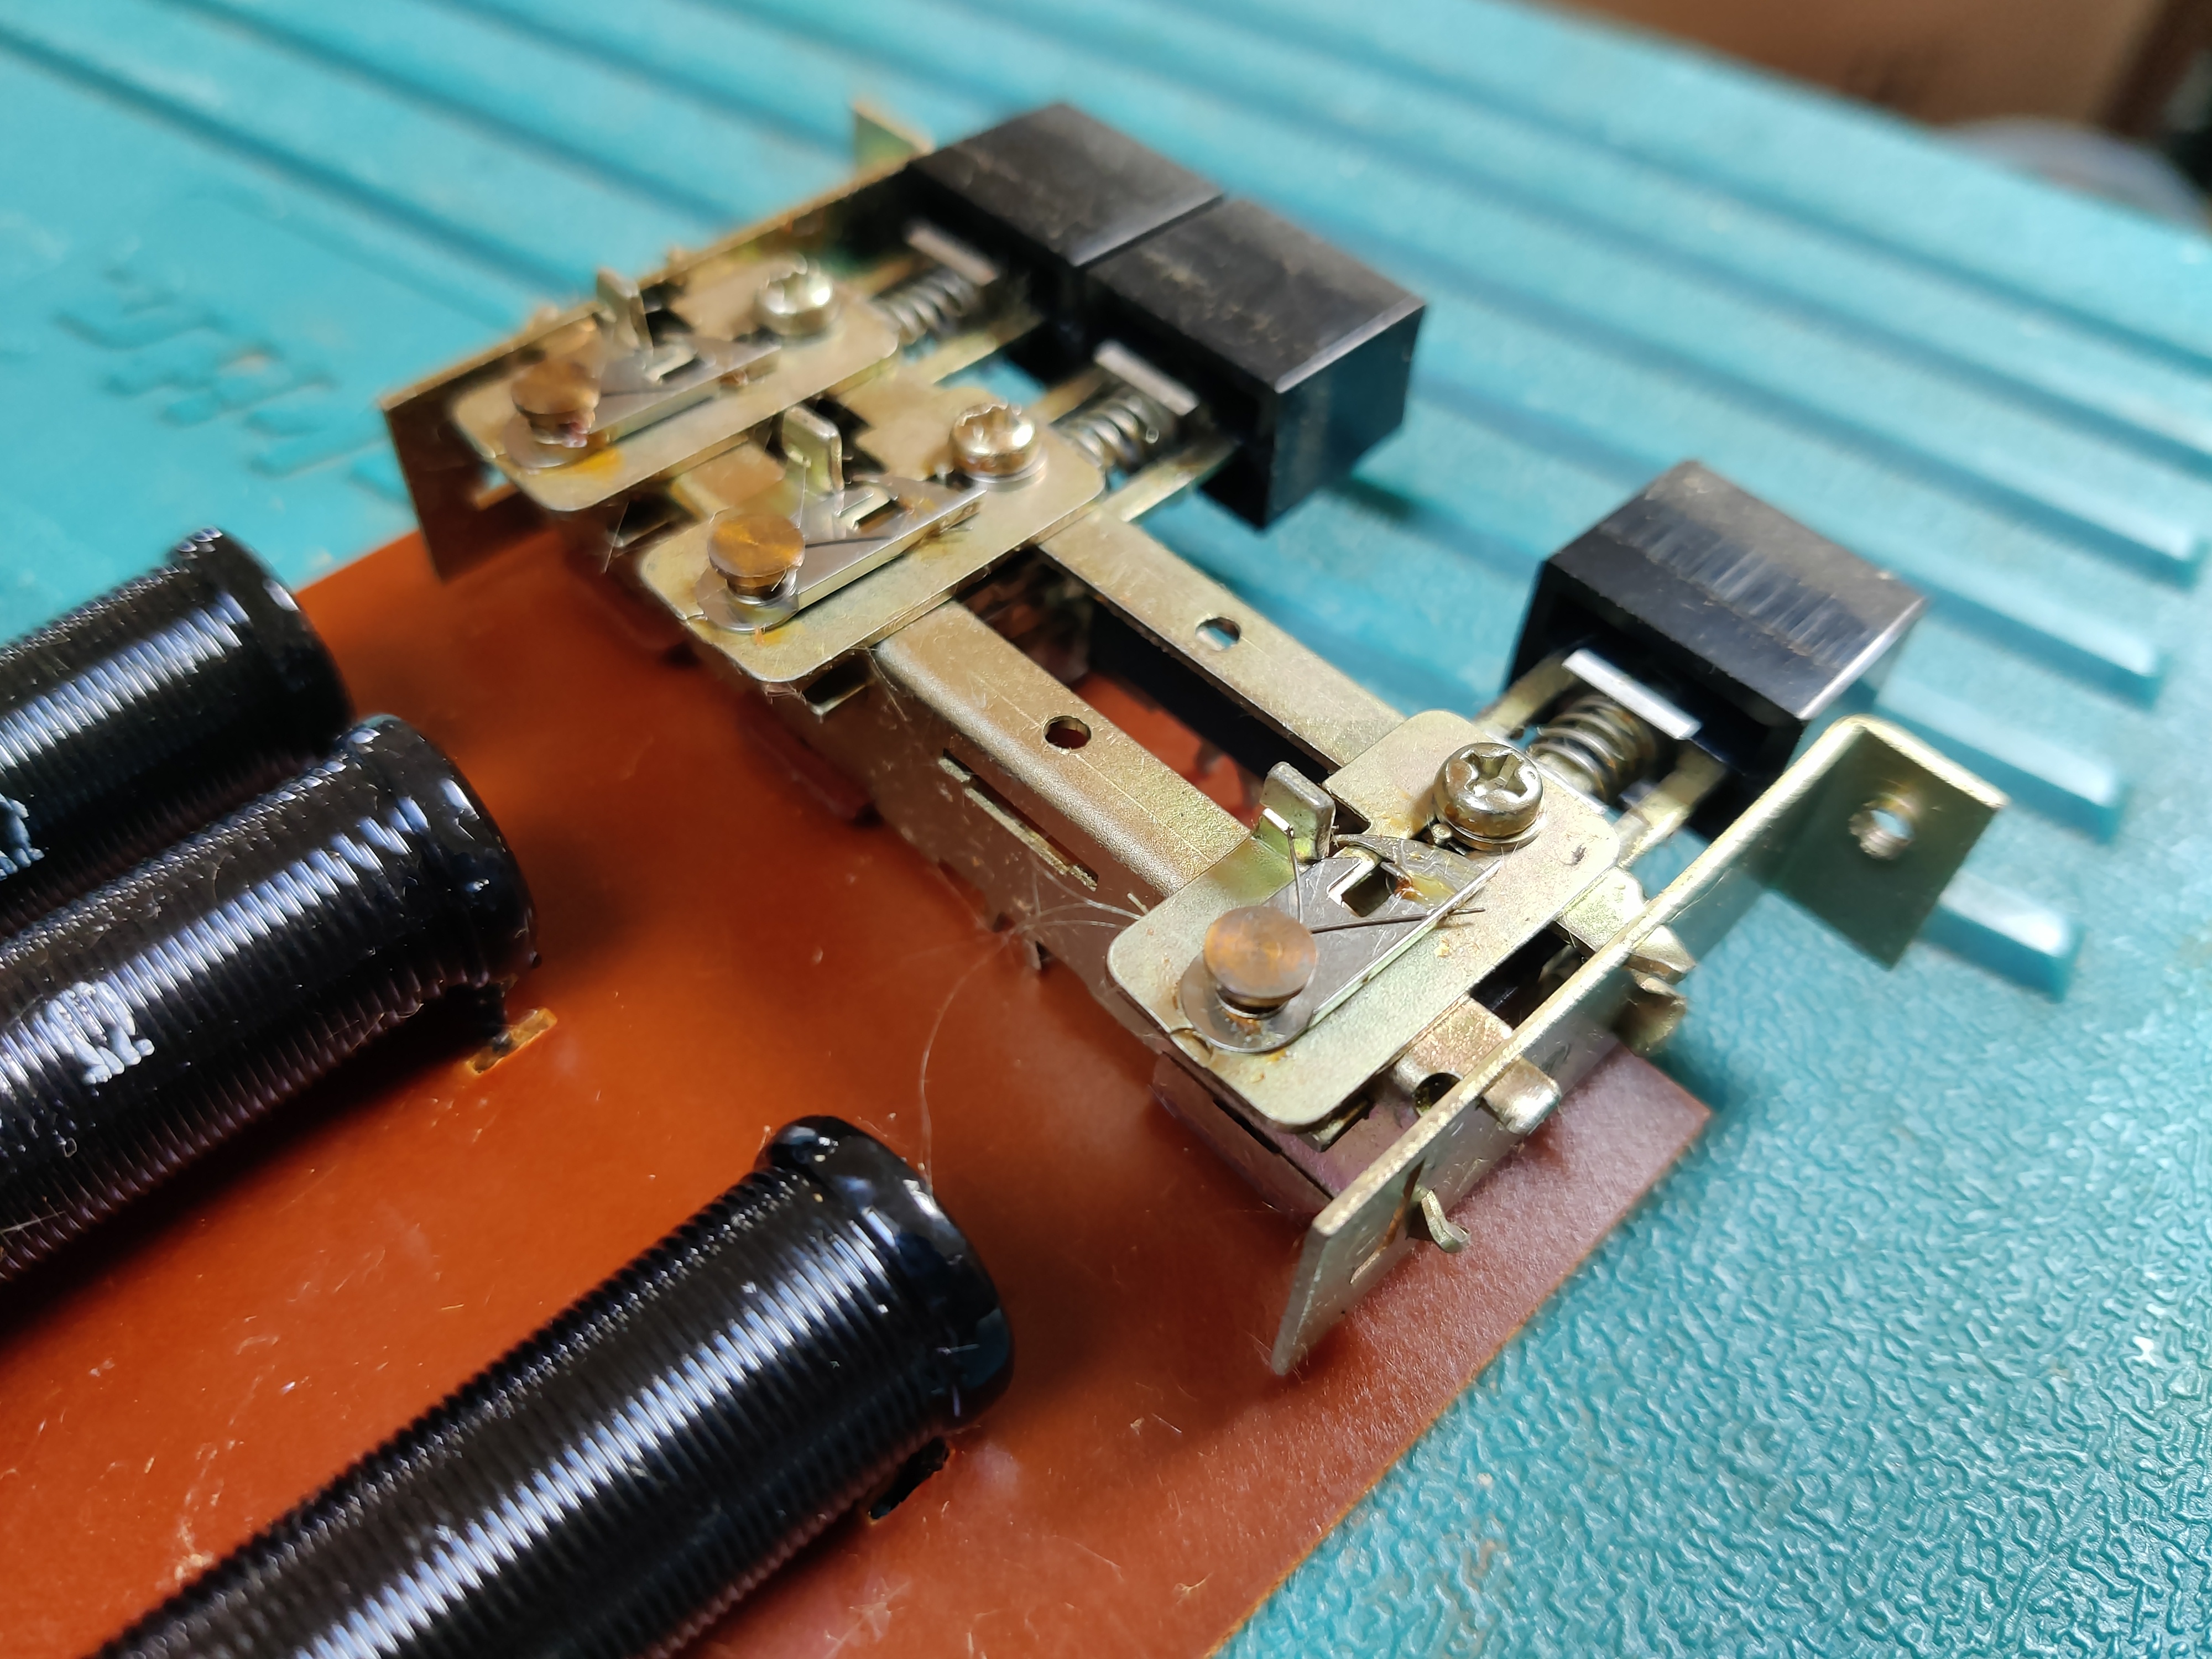
I eventually determined that the tone control switches were at fault. After cleaning the contacts with electrical contact cleaner they are sounding as good as ever.
Here are some phone-photos of the electronics and cabinet.
Promotional Image from Sonics AS-227A manual
Back board
Interior of Cabinet
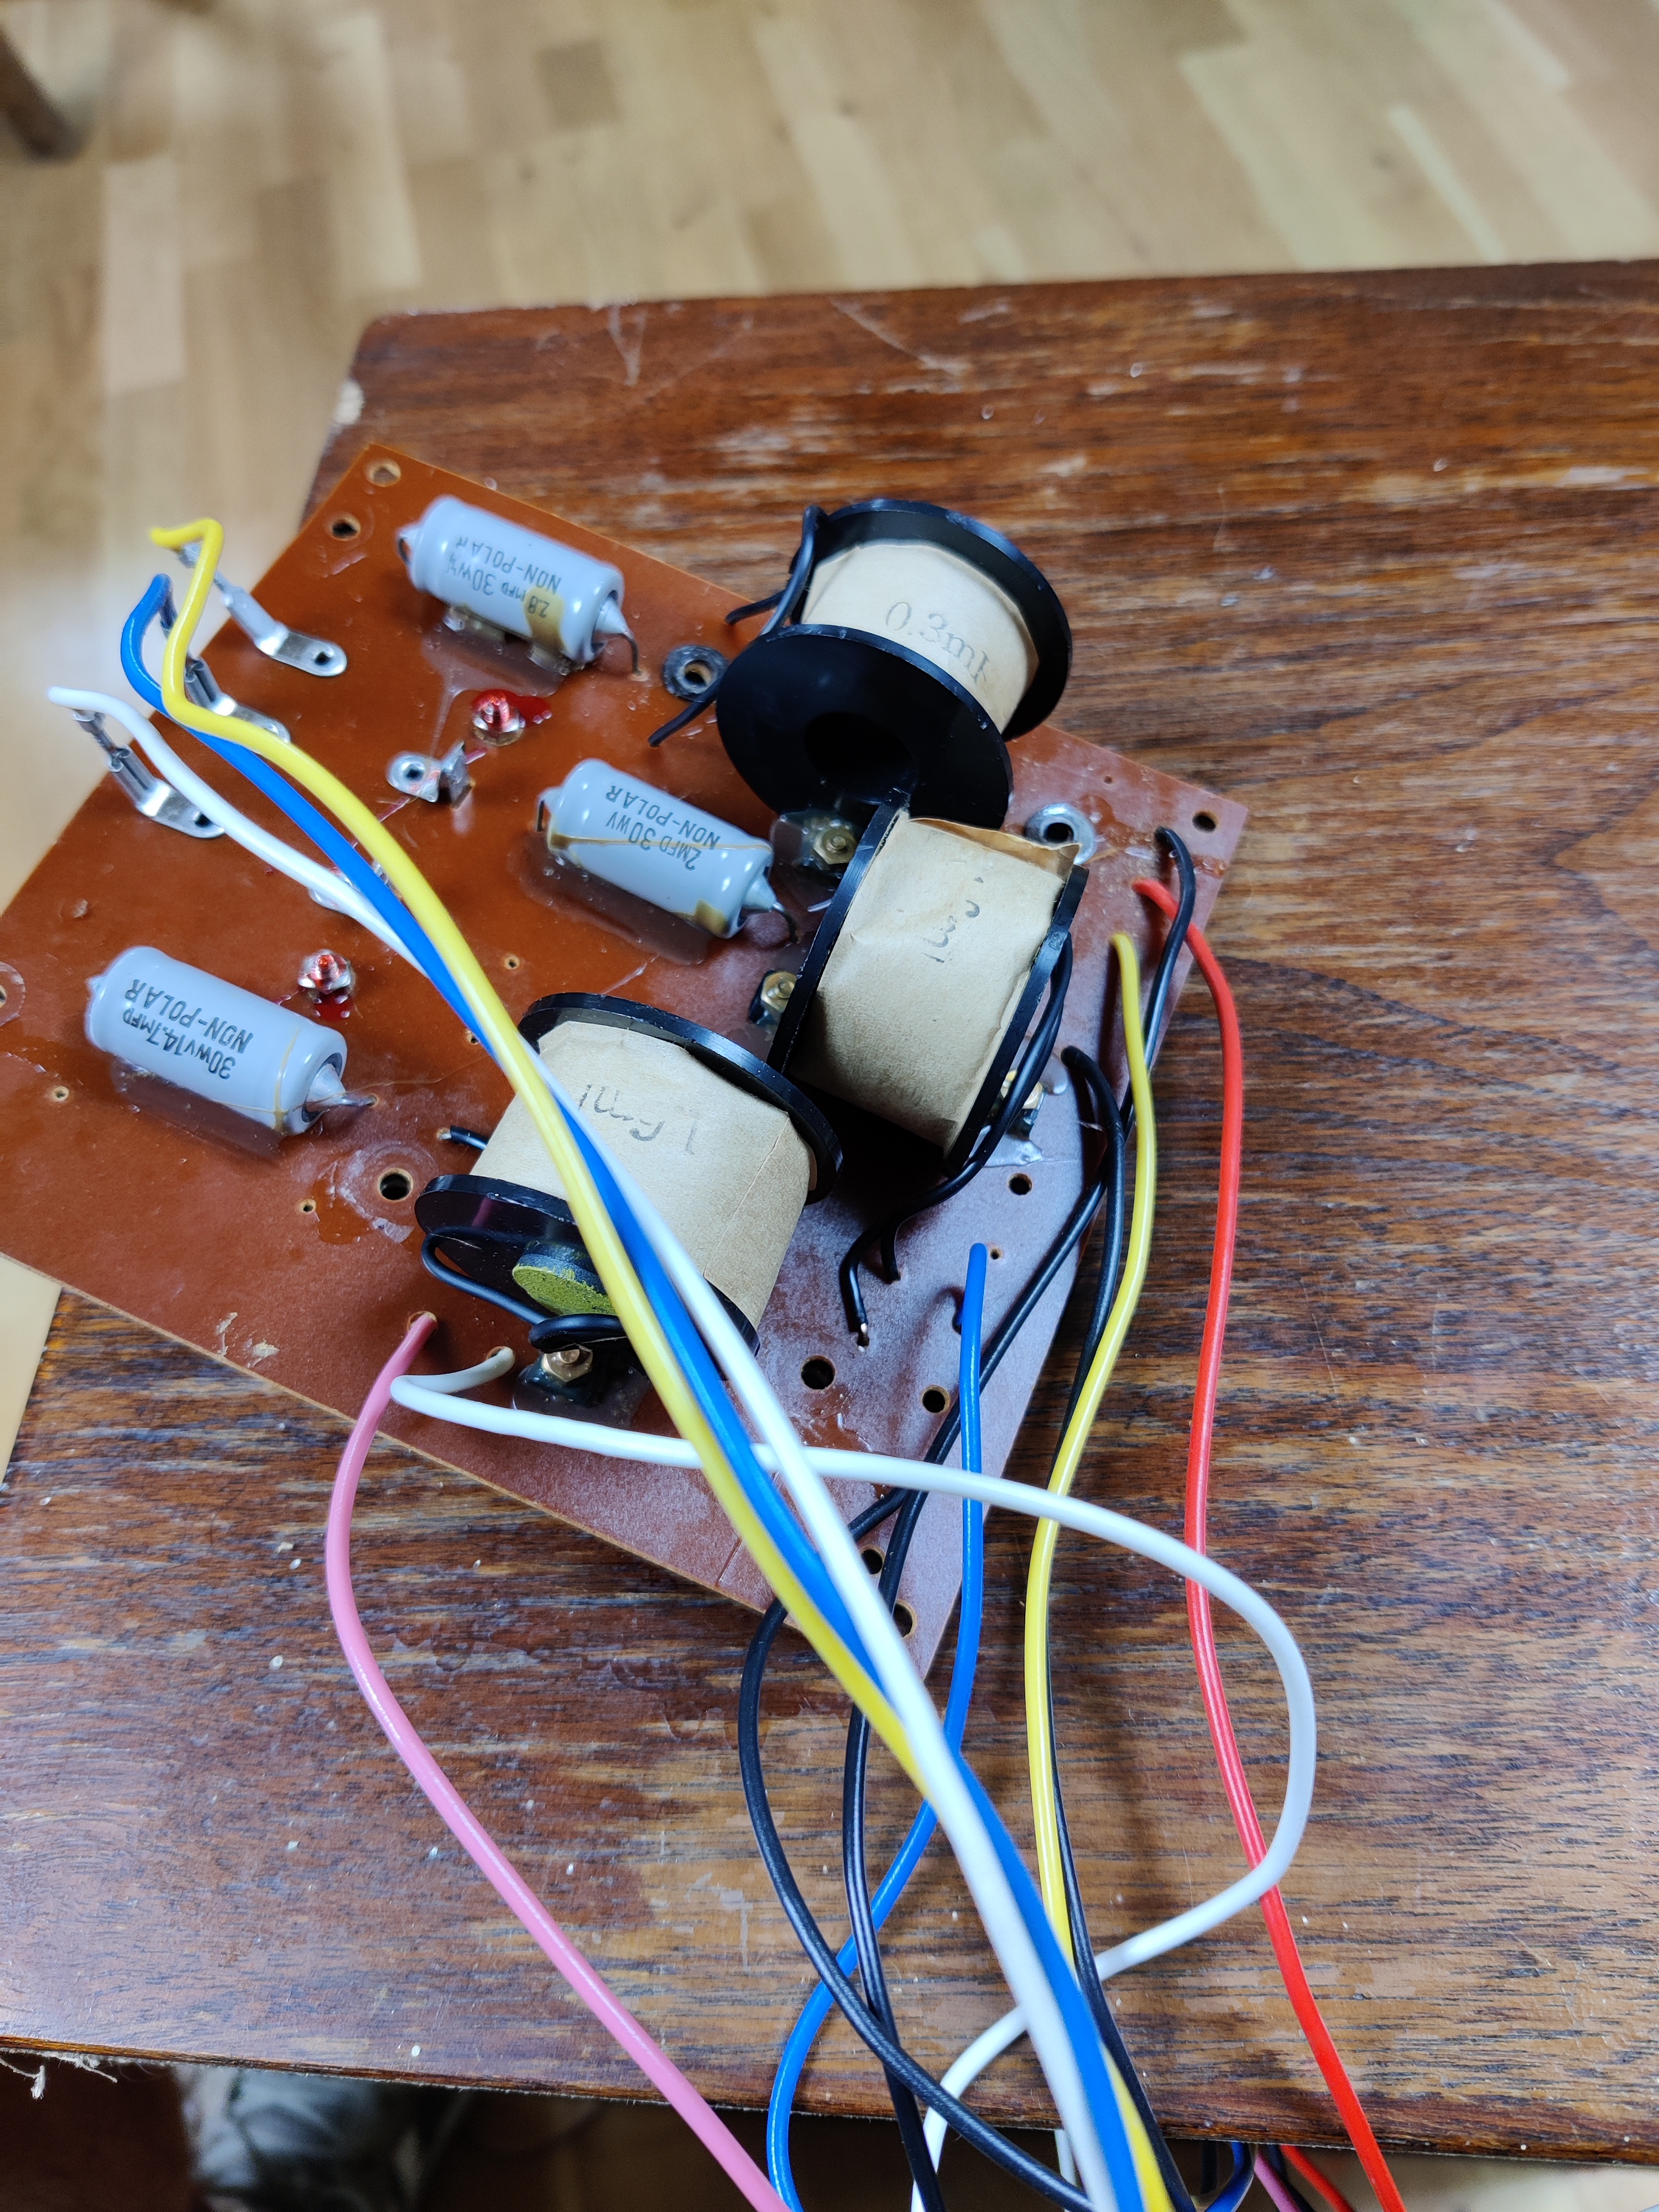
Main Circuit Board
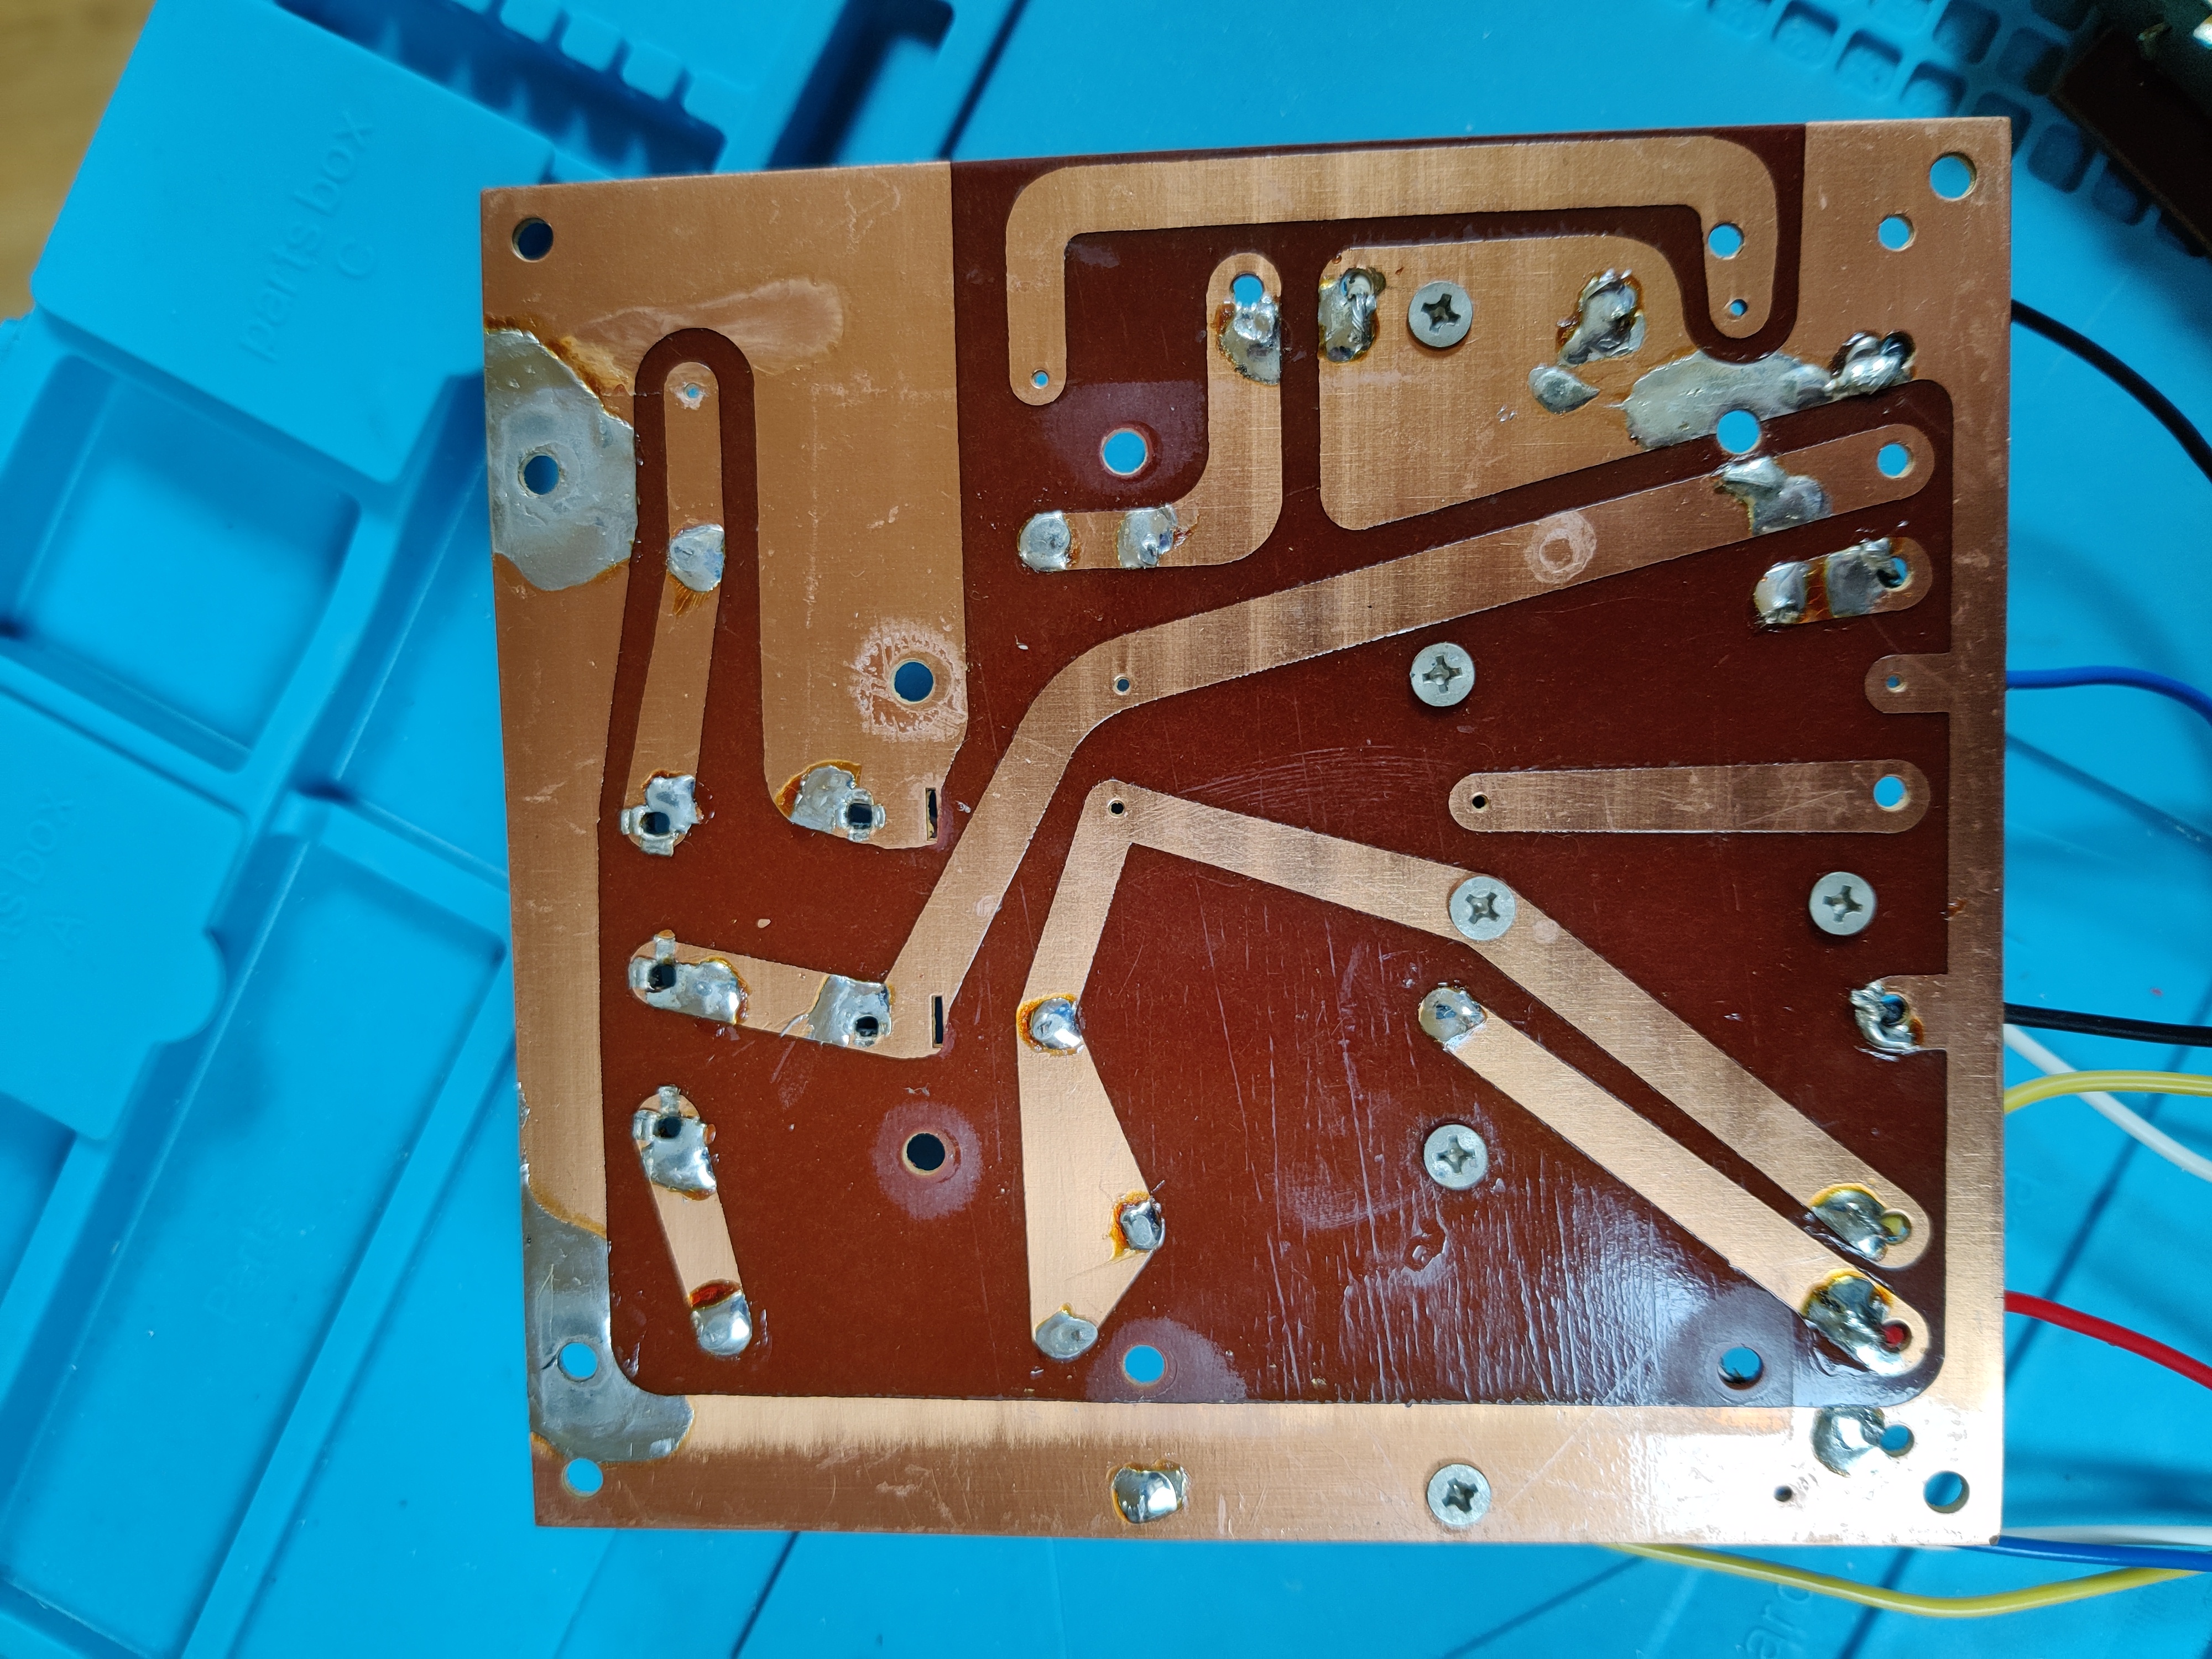
Circuit Board Traces
Tone Board with dust & debris before cleaning
Vintage Sonics AS-227A Speakers - Comments
This is how I got my external Apple Keyboard (pictured) to work with Xubuntu in a similar way to how it works with OSX on my Macbook at work. It’s not perfect, but it does avoid a lot of frustration from trying to use muscle memory OSX keyboard shortcuts on Linux. I am using a British layout keyboard so these changes might need to be adjusted depending on your locale.
Key re-mapping
I used XKB to change the following mappings of ‘real’ keys on the left to ‘perceived’ keys in the OS:
Swap Cmd <-> Left Ctrl
Left Ctrl -> Super/Menu/“Windows” key
Caps Lock -> Left Ctrl (I find this much more comfortable to use on a Mac keyboard, however here we have swapped Cmd and Ctrl anyway so it’s not so useful).
Left Alt+3 -> Hash (#)
Swap ± and ` (the default keymap appeared to have them the wrong way around)
I followed a useful guide to XKB to learn how to make the necessary modifications.
I made the following change to /usr/share/X11/xkb/symbols/gb:
NB: Changing files in /usr/share is not generally encouraged (your changes will affect other users on the system and can be overwritten by software upgrades) but I found this to be the most expedient solution at the time. Make a backup of /usr/share/X11/xkb/symbols/gb first by running:
cp /usr/share/X11/xkb/symbols/gb{,.bak}
I then edited /etc/default/keyboard to contain the following:
# Only XKBVARIANT and XKBOPTIONS needed to be changed
XKBMODEL="pc105"
XKBLAYOUT="gb"
XKBVARIANT="mac"
XKBOPTIONS="ctrl:swap_lwin_lctl,ctrl:nocaps"

BACKSPACE="guess"
Window Switching
Open the Xfce Settings manager -> Window Manager -> Keyboard:
Switch window for same application: ctrl + ` (reality is Cmd + `)
Cycle windows: Ctrl + tab (reality is Cmd + tab)
Cycle windows (reverse): Ctrl + shift + tab (reality is Cmd + shift + tab)
Spotlight
Open the “Keyboard -> Application Shortcuts” settings menu in Xfce. set xfce4-popup-whiskermenu to Ctrl + space (on your keyboard this will actually be Cmd + space)
Screenshots
I commonly take screenshots of an area of the screen with Cmd + Ctrl + Shift + 4 on OSX. You can achieve similar functionality by adding an Application Shortcut (like in the last step) in Xfce for xfce4-screenshooter -r -c as Ctrl + shift + super + 4
Changing fn key mode
I prefer to swap the fn key mode so that F keys do not activate their media functions unless the fn key is depressed.
This can be done by editing /etc/modprobe.d/hid_apple.conf to contain the following:
options hid_apple fnmode=2
Reboot for the change to take effect.
Changing mouse scroll speed
This is not strictly keyboard related, but I found that the default mouse scroll rate was much slower on Linux than on OSX. I changed it using the following instructions from the Unix Stackexchange.
Leftovers
Other things I’d like to do if I were to refine this setup:
Make F13 to F19 usable
Mimic the behaviour of the excellent SizeUp for OSX. I believe some of this is already possible in Xfce, however I found there were problematic conflicts with other applications using my chosen shortcuts of:
Cmd+Alt+left arrow -> window to left of screen
Cmd+Alt+right arrow -> window to right of screen
Cmd+Alt+m -> maximise
Get my common VSCode motion shortcuts working (should be possible in VSCode settings):
This is a quick script to resize all JPEGs in a folder recursively and output them to another folder. It will only resize new images on subsequent runs to save time. The settings in the example are to max width 1280px and file size 200KB.
This is a walkthrough of how I debugged and fixed intermittent HTTP 502 (Bad Gateway) errors on Google Kubernetes Engine (GKE).
Infrastructure Setup
GKE Kubernetes cluster
2 Nodes
1 Deployment, scaled to two pods. Each pod running a single Node.js-based HTTP server application
1 Service
1 GCE Ingress. It manages Google Cloud HTTP Load Balancers via the Kubernetes Ingress API. I was using a Network Endpoint Group (NEG) as a backend, which allows pods to be connected to from the load balancer directly.
The vanilla HTTP Load Balancer Architecture. In my setup, NEGs replace Instance Groups.
NEGs with Containers
Application Server Setup
Requests resulted in HTTP 502s seemingly at random. Running the load test suite was sufficient to reproduce the issue almost every time.
The HTTP Load Balancing docs have information about timeouts and retries. The Load Balancer keeps TCP connections idle for up to 10 minutes, therefore the application server’s timeout must be longer than this to avoid race conditions. My initial Node.js code to do this was as follows, but did not resolve the issue.
// https://nodejs.org/api/http.html#http_event_connection
server.on('connection', function(socket) {
  // Set the socket timeout to 620 seconds
  socket.setTimeout(620e3);
});
Checking for Known Issues
There was an open issue on the GCE Ingress GitHub with several ideas.
Some related to switching from externalTrafficPolicy: Cluster (which is the default for services) to externalTrafficPolicy: Local. By default, the GCE ingress will create an Instance Group targeting all nodes in the cluster. Any nodes not running a pod of the target Service need to forward traffic to another node which is. Using Network Endpoint Groups avoids this situation, as the pods are directly targeted.
There were also suggestions that nodes might be being terminated while receiving traffic (common if using pre-emptible machine types). That was not the issue in my case.
Checking the Logs
Stackdriver Logging creates logs for much of Google Cloud Platform by default, including HTTP Load Balancers:
This was puzzling since I had set the socket timeout in my application code. I opened a telnet session in the container to the server without sending any data and it was indeed closed after 620 seconds, indicating that the TCP timeout was set correctly.
The Server’s View
To see what was happening to these failed requests from the server’s view, I installed tshark (the CLI companion to Wireshark). I scaled down the deployment to a single pod, monitored the network traffic during a load-test run, and saved the output to a pcap file. kubectl cp makes it blessedly easy to download files from Kubernetes containers. I then opened the pcap file locally in the Wireshark GUI.
Looking for HTTP 502 errors in the trace would not be fruitful, because these errors were being sent by the load balancer, not the server. I tagged each request with a random X-My-Uuid header, and logged failed UUIDs during the load-test run.
Using a failed UUID as a display filter in Wireshark let me track down one of the failed requests. I then filtered the trace to only show packets from the same TCP connection.
The trace for the TCP connection containing the failed request. The second column is elapsed time in seconds. 130.211.0.143 is the load balancer. 10.56.5.6 is my server.
Two requests were served correctly in the space of 4 seconds. The failed request came 5 seconds later and resulted in a TCP RST from the server, closing the connection. This is the backend_connection_closed_before_data_sent_to_client seen in the Stackdriver logs.
Debugging the server and looking through the Node.js source for the HTTP server module yielded the following likely looking code in the ‘response finished’ callback:
server.keepAliveTimeout (default 5 seconds) was replacing the socket timeout I had set in the connection event listener whenever a request was received! Apparently this default keepAlive timeout was new in Node 8, there did not used to be a default timeout.
Setting the default timeout as follows resolved the issue: